Once a week I'll gush about an ANAMU accessory that is for sale on my Etsy shop.
I'll tell you why I love it, provide some "making of" insights and, and maybe even entice you to buy it!
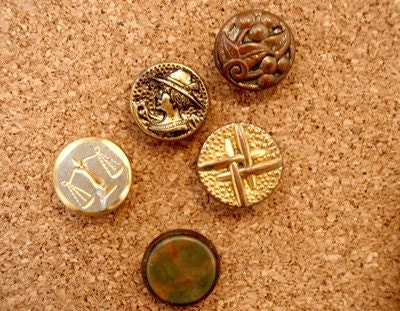
Kicking things off with a Vintage Button Magnet Set of 5.

I love this set in particular because it reflects my taste the most. There's a perfect balance of soft and hard lines, feminine and masculine details, and the colors can compliment nearly any background. These buttons have just the right amount of wear and tear on them too...really playing to their vintage appeal.
Eons ago I set out to buy vintage buttons to serve as pillowcase closures. Never got around to doing that but I did test the buttons out as rings and ultimately decided they would make awesome magnets too. I was standing in the kitchen, eating cereal and staring at the random magnets we've accumulated over the years. Thought...I know it's just a fridge but I want something pretty/cool to look at while I eat like a soldier (my mom's saying for eating upright).
Easy enough right? Stick a button on a magnet and presto. It's almost that simple. These vintage magnets have metal shanks (the protruding loop the thread goes through) and they need to be removed so the buttons lay flat on each magnet.
First I cut the shank off with metal shears (actually, I think they are gardening shears but it works!) and then I sand the remaining metal off so the back is as smooth as possible. No, no sand paper here...I use an electric mini-sander that spins like a maniac. Does the job but it creates so much metal particle dust that a face mask is usually in order.
After that then it's glue and then presto!
There's plenty more I have in mind for buttons but it may require learning to solder. Very excited about that but for now I'll let the magnets have their moment in the sun.

 Today was a cut-and-pin day. This typically means cutting the stabilzer and silks into my purse pattern. Before that can be done, however, I wash and air dry each scarf and then steam to remove any wrinkles. Above is one of the silk scarves in a gathered style. Can't wait to sew it together!
While some of the scarves dried I got started prepping buttons to create more magnets (and push-pins as requested by my friend Liza!). Check out the first set I made a few months ago
Today was a cut-and-pin day. This typically means cutting the stabilzer and silks into my purse pattern. Before that can be done, however, I wash and air dry each scarf and then steam to remove any wrinkles. Above is one of the silk scarves in a gathered style. Can't wait to sew it together!
While some of the scarves dried I got started prepping buttons to create more magnets (and push-pins as requested by my friend Liza!). Check out the first set I made a few months ago 