the setting

Colombian finca weddingColombian finca wedding Colombian finca wedding Colombian finca wedding Colombian finca wedding

Happy Friday, guys! I hope you had a great week. I'm feeling all caught up with work and the home front so now I can start sharing more photos from Colombia. Woo hoo!

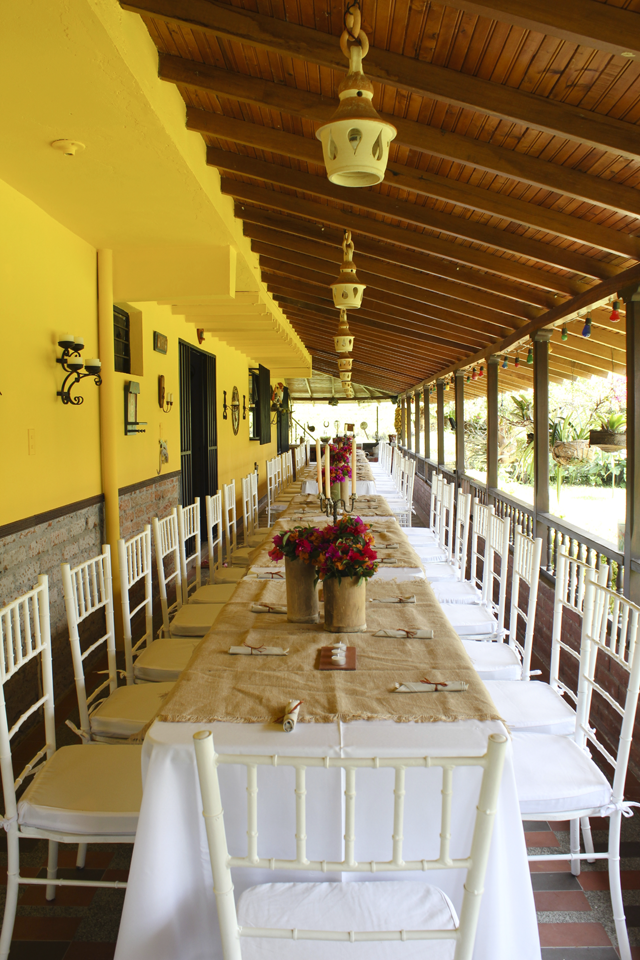
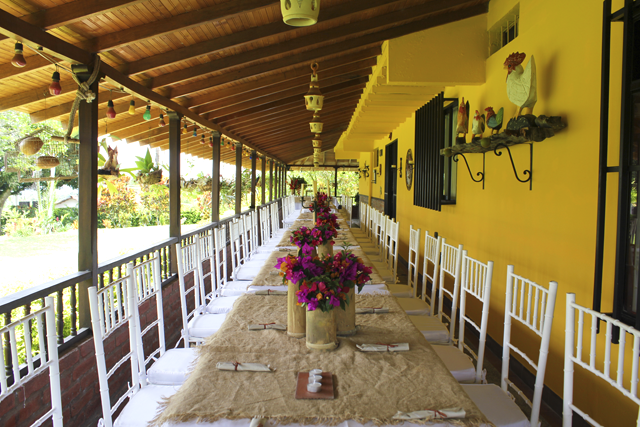
These are from the wedding reception setup in the corridor of our finca. Aside from the table and chair rentals, everything we used had a special and personal touch. And...it was all super simple and easy which is just our style.

For the tables, leftover bamboo from a separate house project was cut to create the centerpiece vases (thanks, grandpa!). Instead of buying flowers elsewhere, I opted to used the bougainvillea from the same cluster of plants where we said our vows. It felt right to bring them to the table and the colors really popped against the yellow walls with the mixed arrangements that my aunt Kristina created.

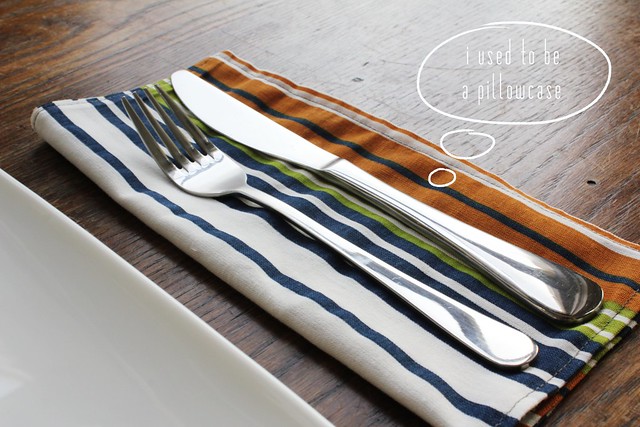
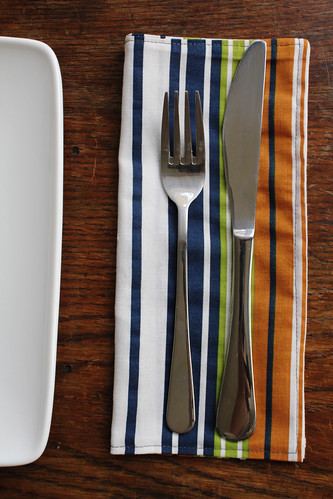
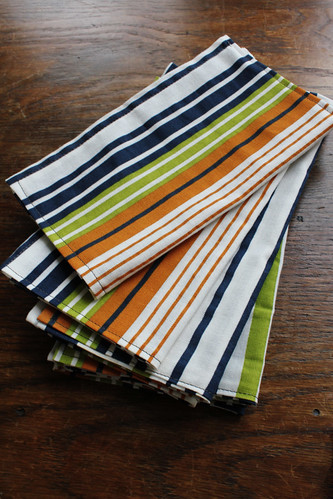
Another aunt brought the tea lights that we placed on remnant terra cotta tiles found in storage, complementing the natural bamboo and burlap already on the table. And to top off the setting, I wrapped biodegradable forks and knives in my favorite napkins that I felt would be perfect for re-using at the finca for future gatherings.

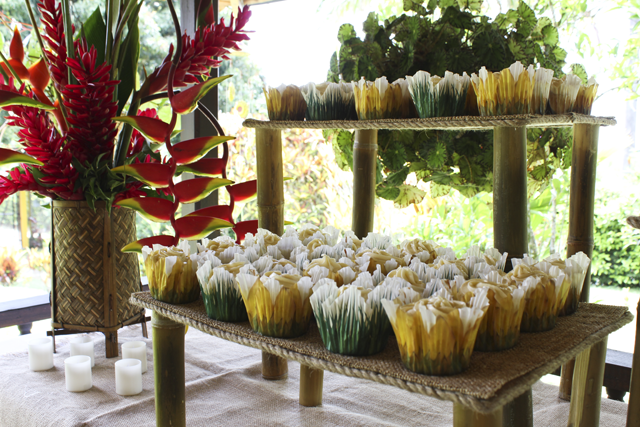
As much as I loved all of the above, my absolute favorite part of the setup was the cupcake table. My mom made the cupcakes and was also the genius behind the display stands that were made using bamboo, cut-to-size wood, thick twine, and burlap place mats. Nothing a glue gun couldn't handle! And of course, the gorgeous tropical arrangement with flowers from the property that brought the whole table to life.

Everything came together so well by using what we had on-hand and getting creative. It was all so fitting for the casual affair and spirited nature of the day, we couldn't have been happier. Gracias familia for pitching in and making it happen!

Wedding photos coming up next week. Have a good one!

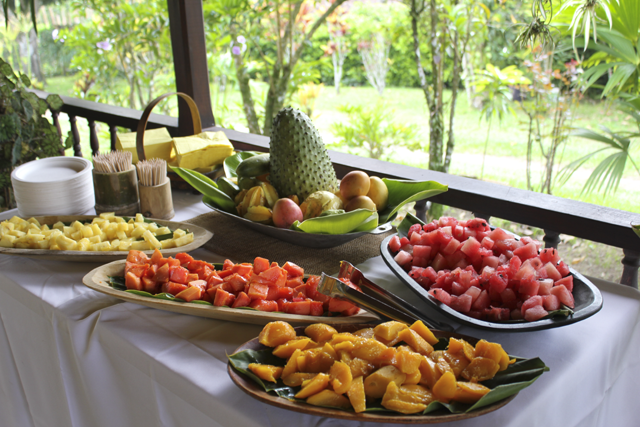
(photos 2 and 3 by Katherine Apolinar)

simple christmas touches

simple christmas touchessimple christmas touches simple christmas touches simple christmas touches simple christmas touches simple christmas touches simple christmas touches

A few simple touches of gold and red around our home have really made it feel like Christmas. From framing wrapping paper to making a mock fireplace, I'm quite happy with what I put together with the little that we have and can commit to. I really thought that we'd go without a tree this year since very few natural ones are imported (and are crazy expensive) so I was happy to find a little felt one from MUJI. It may not be big enough to put presents underneath, or give off the lovely smell of pine, but I love it. And best of all, we can flatten it and take it with us wherever we go without taking up much space. Maybe one day we'll have dedicated garage space for holiday decor but for now, we've gotta stick to a large shoe box ;)

How do you decorate for the holidays? Do you deck the halls or just have a few favorite pieces?


friday pic & pin

friday pic & pin by Anamu 25 Happy Friday, guys. For those of you who celebrated Thanksgiving - are you still totally stuffed? Can you please overnight some yummy leftovers? Pretty please?

As you can probably tell, I didn't have much time to plan a feast of our own but maybe we'll come up with something over the weekend. If not, I will definitely be getting crafty and will start decorating for Christmas. A little DIY I did for autumn was a flower votive using a ball of cotton twine - I know, so stupid simple but I love it!  You can see where I got the inspiration + more photos over at Poppytalk (plus check out their Black Friday & Cyber Monday handmade deals)

Cheers to the holiday season, I hope you have a wonderful weekend!

This week's three rad links...

• tips for flying with a toddler

• get over your DSLR camera freight and get the holiday photos you really want

• a gift guide that gives twice + i'm now officially obsessed with LemLem. love the way they're making Ethiopian textiles look and feel so current.

(image left: autumn centerpiece DIY by Ana Maria Muñoz, right: Pin via Honey of a Thousand Flowers)

{diy} book cover to frame mat

book cover frame matThere's one LA souvenir that I haven't mentioned: a DIY frame mat for a very special photo of my little girls. I used a cover from one of their torn-beyond-repair Golden Books to frame a photo that I snapped of them during my visit. Considering that I had to cram my craft time in between toddler nap times, it was the perfect quick and easy project to take on. If you have some old books in your life that might fit the frame, click on over to Poppytalk for the complete how-to. Let me know how it goes!

{diy} ikat inspired beach bag

DIY: ikat inspired beach bagDIY: ikat inspired beach bag DIY: ikat inspired beach bag

I love a good basic bag that will stand the test of time. This one from MUJI comes kinda close to the coveted quality of Filson so I was very excited to snatch it up and bring it home. The simplicity of the canvas and leather is great but since it's summertime, I thought that I'd have a little fun with an easy DIY. I chose Ikat weaving as my design inspiration and am so happy with the results! The colors, the lines, all very subtle but they give the piece a totally different personality. I think I might do this in the future with simple cotton totes as re-uasble gift bags...lots of possibilities.

If you're not familiar with MUJI (I wasn't until we moved to London) they are an awesome Japanese company that keeps things focused on simple yet practical design. They have barely made their way to the US with stores in NYC but I hope that they expand if/before we move back. I can't imagine life without them now - they're like a small-scale, more earthy, back-to-basics Ikea. I couldn't find my exact bag in their web store but they have a ton of great styles to pick from. Happy stitching!

Wanna see more? Click on over to Poppytalk for the full DIY tutorial!

growing a green thumb

succulent plantingsucculent planting succulent planting succulent planting succulent planting succulent planting

If you're like me and have yet to master your green thumb, check out these potting steps and tips that I learned at this weekend's Handmade KL craft party:

1. Choose your container (white ceramic teapots were provided. i planted the rest into a bowl from our kitchen)

2. Line the bottom of your container with an inch of rocks followed by another inch of gravel. This will help in the drainage of water.  (Made so much sense because I always rot my plants that aren't in pots with drainage holes)

3. Add 3 tablespoons of crushed charcoal which will prevent the growth of bacteria. (Never heard of this but maybe it's a climate thing?)

4. Fill the container with soil up to half an inch from the top of the container.

5. Gently arrange your selection of succulents on top of the soil.

6.  Once you're happy with the arrangement, top up with soil then gently pack in with the succulents.

7. Brush off any first from the succulents then water them.

It's as simple as that! I can't believe that I was so intimidated by potting plants myself. Now, for the real test: maintaining these babies at home. Any tips?

"how to" instructions courtesy of craft party host, Mimpi Murni

happy friday!

I hope you had a good week and got a taste of Spring like we did here in London (it's so close!). We're thinking of doing a day trip to Oxford tomorrow so if you have any tips or suggestions I'd love to hear them - especially if there are any antique markets ;) I just updated the shop with several items but I (and you, I'm sure) can't ever get enough.

Here's to a fun weekend filled with new treasures and adventures!

This week's three rad links: • Celebrate St. Patrick's day with Leah's Irish Stout Brownies recipe. I may try it but I'll need all of the luck in the world to pull it off (baker in training). • "Creativity is not magic, and there's no such thing as a creative type." I loved this article on the simple science of creativity via the Wall Street Journal •  In case you missed it, my first DIY contributor post for Poppytalk is up. Happy making!

(image: vintage pair of espresso cups via The Pond Market)

re-style your wireless internet router {diy}

router book cover diyrouter book cover diyrouter book cover diy router book cover diy router book cover diy

In order to receive wi-fi signal throughout the rest of the flat, our router must be placed in a prominent location of the living room. This diva signal initially left us with an eyesore of an ugly, blinking light box and I hated it. I did everything I could to camouflage it by setting picture frames and flower-filled vases in front of it.

One day, after I had complained enough about it, Joe had the brilliant idea to cover it with a book. Heellooo....yes, so obvious and so perfect! A few days later he came home with a vintage book he bought for 50p (cents) and got to work with his trusty blade. It took less than a minute to cut the pages out and bend the spine to widen the overall fit. Once the cover was placed over the router I saw the true brilliance of Joe's idea - simple, practical, and effective. He was definitely onto a new tech/decor trend of using books to make necessary gadgets feel a bit more homey.  Anyone think they'll give this a try?

On a more sentimental note - are you wondering what the writing and clippings inside the book are? Apparently one of the previous owners, Maud Harbin, had a true love of gardens. When I took a look at the book for the first time I almost refused using it for the project. But since we can't hold onto everything, I compromised by spending some time flipping through it and photographing my favorite parts.

This book was a gift to her and in it she wrote lists of her favorite flowers, plants, trees and saved paper clippings with quotes and garden-related news. I fell in love with the energy of the book. Yes it is titled "California Gardens", but you could almost feel how precious this was to her, how much time she spent reading through the pages, carefully curating her own lists and adding her own notes. My favorite find was a hand-written quote on the inside of the back cover that reads "winter cannot dim the glow of the garden." No ma'am it cannot. Thank you for the inspiration, Maud ... and for covering the ugly blinking box.

vintage book vintage book vintage book vintage book vintage book vintage book

upcycled napkins {diy}

napkin diynapkin DIY IMG_9719 IMG_9728

Remember the pillowcase I picked up here? Well now we're enjoying it as a new set of napkins - just in time to complement my new cooking skills!

I love upcycled projects like this, especially when they're as easy as one two three (cut, iron, sew - oh and of course pre-wash so make that four).

Buen provecho!

a very simple {diy} christmas

IMG_7595IMG_7598 IMG_7935 IMG_7612 IMG_7939 IMG_7602

There's nothing like Christmas to get a crafter's mojo going. However, as much as I love the excuse to create and decorate, I did refrain from getting too crazy. Since this could very well be our only Christmas here in London, we didn't want to do anything that would involve buying too much or have to store/sell later. Thankfully we're pretty simple when it comes to decor anyway so it wasn't too hard to do.

Other than fresh flowers and the tree, the only out-of-the-box decor we bought were a dozen fair trade glass ornaments and two strands of LED lights (we love them and will never go back to regular bulbs again!). Everything else was re-purposed from items in our home or bought for DYI-ing like the ribbon for the wreath, spray paint for the vases, and the oranges + cloves for the pomanders.

Here's a quick rundown of each little DIY project:

Orange pomanders: Not much explaining to do here as it really is a "what you see is what you get" type of project. Only tip would be to first poke the holes in the orange with a toothpick so that the cloves go in much easier (and don't break). As the cloves soak up the citrus from the orange - and ultimately dry it - it gives off an incredible fragrance.

Light wreath: I started by bending a white dry-cleaner hanger into a full circle and closed it using a twisty-tie (like the kind you tie your produce bags with). Then I wrapped a single strand of lights around the circle and then did the same with the ribbon. I used a net-like ribbon so that I could place strategic openings over the lights to secure the ribbon in place. I also just love how the shadows look against the wall when it's all lit.

Winter-white vases: We recycle our glass but this time I wanted to re-use some of them myself. First I cleaned and removed the labels off an instant-coffee jar, wine bottle, and olive oil bottle. Then I coated them with a fast-drying matte spray paint and in a matter of minutes we had some modern white vases!

As for our tree ...we can't bring ourselves to buy new ornaments and haven't gotten around to making anything else. But you know what, I'm really digging the simplicity of the tree with just a single strand of lights wrapped around the trunk. When else do I get to have a pretty tree inside the house? It's pretty cool on its own so I don't think I'll hate it if we never get around to decorating it (sorry, mom!).

{diy} cape cape hooray!

DIY cape DIY cape DIY cape DIY cape DIY cape

How fun is this cape?!? I'd like to say that I completely made it myself but I had a lot of help from DIY Couture's designer herself, Rosie, during a recent workshop at the Papered Parlour.

I don't normally do style posts since I feel like I get totally awkward when posing but I figured that this cape deserved a proper shoot. Sunday's mini-countryside excursion (and Eton College's...sshh...private park) proved to be the perfect setting to hop around and take some snaps. The glow from the sun was incredible and since we don't get many days like that in London, all of the colors were extra amplified in my mind. Super bright, bold, and almost unreal (hence the crazy Photoshop treatment!).

What's totally real is how easy it was to make this cape. Rosie's company, DIY Couture, is founded on making clothing construction easy to understand, and more importantly, do. I am completely head over heels with her approach to creating your own couture designs and here's why...

My degree in fashion merchandising required me to take sewing courses where all we did was create or work off of technical patterns that were often too fussy or intimidating. DIY Couture simplifies the construction process by speaking in layman's terms and providing simple visual instructions that have more to do with practicality than technicality. I was super impressed with how she taught the workshop but when I got home and flipped through her "How To Make a Cloak" book, I was floored. The visuals are simple and pleasing to follow and the options for customizing pieces (hood, collar, etc) are very approachable. For example, to create the hood pattern she instructs to lay down a hood from a sweater you already own (and like) and trace to cut - so practical and effective!

I could rave about it for days but as for my personal couture cape, I opted to forgo a hood or collar for a more simple neckline. I also didn't add a button so that I could keep the option open to use vintage brooches and mix it up as I please. When I realized that not doing any of the above made my cape reversible, I was a very happy girl! Joe later had the great idea to buy vintage cufflinks and use them along the entire front - perfect for reversibility, right? It means that I'll have to create button holes after all but it's okay, the book has easy instructions for that too.

But now it's YOUR turn to make a cape, cloak, or caploak - whatever, it's couture design!

I'm giving away my copy of  "How To Make a Cloak" to one lucky reader. Simply write a comment below, anything you'd like, and I'll pick a name at random next week. C'mon, capes are so hot right now ;)

and p.s. thanks for all of the tweet, comments, and email love from yesterday's launch of the pond market!!!


oh and check this out!

DIY calling cards (created for Travelettes) My first guest-post for a blog was published yesterday! I was really excited when the ladies from Travelettes asked me to create a project for their new Sunday DIY feature. I took inspiration for the calling cards from one of my fave's, Pugly Pixel, and I love how they turned out - simple and effective. Check out the full post + photos here.

A BIG thanks to Travelettes for inviting me to join the fun!

{diy} frame that fancy paper

{diy} frame that fancy paperworkspace

Remember when I complained about the lack of sunshine in London? Shortly after I decided to take control and bring the golden rays into my workspace. I had always wanted to frame paper so this was the perfect opportunity to do it - finally, something to make with all of those beautiful sheets of paper from the stationary store!

I opted for a gold, shiny (and I admit, a bit gaudy) paper from Paperchase and paired it with a black metal frame from Habitat. I love the bright glow that reflects from the opposing window, even on the greyest of days. Mission totally accomplished. What I love even more is that I can change the paper in an instant and always have a fresh piece of art. With pretty paper costing less than five pounds I'm definitely tempted to swap often but I think I'll keep the golden glow for a while.

p.s. a big shout out to my vintage desk lamp! i loooovvvee yoooouuuu.

{diy} vintage brass buttons = new necklace

vintage buttons necklace DIYvintage buttons necklace DIY vintage buttons necklace DIY vintage buttons necklace DIY vintage buttons necklace DIY

Remember the vintage buttons I found at the Sunbury Antiques Market? Well, I finally made the simple necklace I had envisioned and it's already one of my favorite go-to's.

The great thing about making long length necklaces is that you can simply tie the chain in a knot and not deal with clasps and jump rings (the little round connector pieces). This was such a quick and easy DIY, I'll definitely be shopping for more vintage buttons!

{diy) boy meets girl...mens bowtie belt

{diy) boy meets girl...mens bowtie belt{diy) boy meets girl...mens bowtie belt{diy) boy meets girl...mens bowtie belt {diy) boy meets girl...mens bowtie belt {diy) boy meets girl...mens bowtie belt {diy) boy meets girl...mens bowtie belt {diy) boy meets girl...mens bowtie belt

I finally got crafty with a vintage bowtie I bought at Camden Market a few months ago. I was sifting through vintage neckties and thinking of what I could make with them when this simple black bowtie popped right out and told me what to do.

Surely you can tie a bow out of anything to make a belt but I love the fullness, weight, and perfection of a mens bowtie. Especially when paired with a pretty ribbon.

I'm really happy with the way that it turned out but for the next round I think I'll try a few modifications: use a more stretch-friendly ribbon (so woven threads don't break) and find a way to make it fully adjustable to wear either on my waist or hips. A girl needs options, right?

Let me know if you make your own or get inspired to create something else with a mens bowtie...there are so many possibilities!